Showing posts with label Tips. Show all posts

Wednesday, December 9, 2015

Sign in, Sign Out on a pseudo-Droid? (Not BB-8)

Most schools have a policy that requires students to sign in and out of a classroom if they request to leave the room during class time or arrive late to class. similarly, most computer labs have a sign in and out book of some kind. 

Recently, my school Tech support person approached me about some very old Asus Netbooks that were really good at collecting dust and keeping papers from bowing away. I was asked if I had any use for them. Being the tech hoarder that I am, I immediately jumped on this opportunity and took as many as I could. Why would anyone want an Asus Eee PC seashell series Netbook you ask? Well, the intel atom process is perfect for running Android. That's right, Android. I grabbed up those paper weights, and put some of students on the task of cleaning them up, and creating one solid tweaked out Netbook. We downloaded a pre-compiled x86 branch of Android from the android-x86 project hosted on Sourceforge. We installed the operating system, and just like that, this paper weight was a newly rooted Android tablet. 

Why would we do this you ask? Well, I was getting annoyed with having to continuously clean up the fake names and doodles on my sign in/sign out book in my classroom. I was also annoyed with the occasional interruption in the middle of class because the pen or pencil was missing from the book. I decided to use this device to house a google form as my classroom log. This has helped to eliminated the fake names, times, and most of the fake reasons for leaving or arriving. I also haven't had to replace the writing implement yet! 

The device is a nice piece of equipment to leave near the door. I don't  really care if anything were to break. Similarly, if a student were to try and take it, the battery won't stay charged for very long, and being a pseudo Android, it only works if you have wifi. The device can't make calls, or use data. Since it is rooted device, I easily password protected all apps. A student wouldn't get very far. Unless they could hack my 5 sentence password. (shoot now they now it's 5 sentences. It still won't matter.) 

Here is my routine with the device:
  1. First I made a Google Form to mimic my sign in sheet. 
  2. I have the form set to require users to log in. 
  3. I also made a fake google user in our domain to remain signed into the form during the day. 
  4. On the android device, I made this form the start page for Chrome. 
  5. In the morning, I unplug the device from the charger, sign in as the "science" user on the form and place it on the desk by the door. 
  6. When a student leaves they sign out. When they return, they sign back in.
  7. The form is also available to all students if they want to use their own device, however they have to log in with their Google Apps account to access the form. 
  8. At the end of the day, I shut off the device and put it on the charger. Typically the machine has been holding a charge throughout the day. The Android spends most of the day in sleep mode anyway. (The Android is also set to wake without a password. Upon waking up, it starts in Chrome) 
Really, any device would work. All I'm doing is accessing a google form. I felt this was a good use of a piece of equipment that was heading for the landfill. It was also fun to turn this thing into an Android. 

Saturday, November 28, 2015

Goobric and Doctopus in Classroom

It has been a while since I posted about technology. I took a well needed break from writing as well as from technology. A little tech detox was refreshing.
Since this is my first post in a while, I'll keep it short and sweet. I've been travelling around teaching teachers about the very basics of Goobric and Doctopus combined with Google Classroom. This is a very, very short introduction. However, it is  enough to get you going.

Enjoy.


Saturday, March 14, 2015

Increased Readability

Getting students to read in the classroom always poses a challenge. Here is the typical scenario, the teacher assigns a reading complete with appropriate "pre, during, and post" reading strategies that are creative and engaging to hopefully increase student participation. Most students will do the work, but may not truly grasp all the information. Here is the typical student reaction to the reading;
They flip to the first page, stare at it for a few minutes, maybe read a sentence or two. Then they get distracted by something for a few minutes, go back to the reading and realize they don't know what they just read so they go back to the beginning. Then they are frustrated with having to start over, so they start to look how much they have to read. They then bend the book back and physically hold the chunk of the pages they need to read, and stare at it with a look of defeat and wonder how they will ever get through it all. Then, they start again, only to go through this whole process again before asking if they can go to the bathroom.  

 It is clear they are simply reading for the sake of getting through the assignment they aren't really getting much from it, despite the efforts you put forth with the reading strategies. Here is my super secret process for getting students to focus on the content and not the amount.

Super Secret Tips

  1. Choose current, relevant topics that are short, sweet, and right to the point. Some of my favorite science places to obtain good articles are:
      1. NPR Science
      2. BBC Science
      3. Smithsonian TweenTribune
      4. Student Science
  2. If I need to use other readings from a book or text book, obtain digital copies, and again use recent publications. My textbooks from 1992 are really just good for a weight or building material for some lab activities. They make really good holders for Popsicle stick bridges, great walls for Lego Robot courses, awesome supports for ramps when doing acceleration and velocity experiments, they also work really well to hold down the end of a board for pendulum demonstrations. 
  3.  This is super important for this final trick...Use a digital formats. This will allow you to use various reader tools to adjust how much text will show on a single page. 
Now, the moment you've been reading on for, the final trick!

Use an appropriate reader tool to make the font huge, and limit the amount of text that appears on a page. You need the digital format to work in your favor, meaning that you want the format to keep your students engaged and feel as though they are making progress. Essentially, you are taking away the "chunk of pages" they want as visual cue to the finish line.The trick is to make the text as big as possible, and adjust the formatting to squeeze two to three paragraphs on a single page. It feels like you are cruising through the reading, and there is not an overwhelming amount of text on a page to throw you for a loop. 

I will use one of these two methods.

My first option, if I already have an epub, or mobi in the correct format is to use a online  tool for chrome called Read &Write for Google. What this does is allow me to upload my epub, mobi, azw3, pdf...etc to Google drive, share the document with students, and let them open the edoc. The app provides a nice online viewer that has the described format of a large font and limited text per page. 

Or, I use Issuu to share documents with my students for reading purposes. Issuu does a fantastic job making the digital format feel like a physical book. To obtain this trick I have students choose the single page mode, and zoom way into the document.  This requires students manually adjusting the settings, it may not be quite as effective. 


Thursday, March 5, 2015

How to quickly enable/disable the Confidentiality Notice in gmail.

Most teachers should have a notice like this attached to their emails...

CONFIDENTIALITY NOTICE:

This e-mail message, including any attachments, is intended for the sole
use of the intended recipient(s) to whom it is addressed and may contain information that is legally privileged, confidential and exempt from disclosure under applicable law. If you are not the intended recipient, you are hereby notified that any disclosure, copying, distribution, use and or taking any action on reliance on the contents of this electronic mail message, confidential information is strictly prohibited (Fed Reg 42CFR, part 2). If you have received this e-mail in error, please notify us immediately or arrange for return of the original electronic mail transmission.
-- 

This essentially adds a layer of protection to you with your parent/guardian correspondence. It reminds the recipient that the conversation is confidential and shouldn't be shared with anyone outside of the immediate concern.

Adding this to gmail is easy. Typically, users will add it as part of their signature.  However, there are times when you may not need to have this notice, like if you are corresponding internally to colleagues with just a quick note like "The team meeting today is canceled." You don't necessarily need the notice with this type of message.

Here is how you can quickly turn this on and off in gmail, as needed.

1) Log into your gmail.
2) Click the gear icon and select settings.
3) Navigate to labs and enable "canned responses"
4) Save your changes, gmail will reload.
5) Compose a new message. You can leave the To: and Subject: lines blank.
6) Insert you confidentiality notice into the body of the email.
7) Click the little down arrow next to the trash can, and select "canned responses."
8) Select "new canned response"  give it a name like "confidential" then hit ok.
9) Now when you are typing an email that warrants the notice, simply hit the arrow again
10) Select canned response and insert the one you just made.

This will allow you to quickly enable the notice as needed, depending on the nature of the email.


Monday, March 2, 2015

Chrome Distill Option

Chrome seems to be one of the popular browsers for education...(in due time Opera will take over, but that's just my opinion). Chrome is packed full with extensions, add-ons, security, speed...etc. All the features you'd want in a browser. One of my favorite add-ons for education has been Clearly. This is a nice simple tool that allows you to distill the page to leave you with simple text, and quickly export the information to your Evernote account, if you choose.

However, Chrome has made the distill process much simpler...sort-of.  It is embedded into the browser. There is a tiny trick to turn it on, but once you do, it invokes the cleanliness of Clearly right in the browser, without any add-ons. However, you won't have the options that Clearly offers, but you still can access the native distill option for clean reading. Here is how.

1) Regardless of your OS, find your Chrome launcher.
2) Navigate to the properties of that launcher, typically a "right-click" will bring up a menu to find properties.
3) in the "target" box or "launch Command" add this at the end
--enable-dom-distiller

Here is a screen shot of mine (Note, i'm running Linux and using Cairo-Dock as my launcher so the screen is going to look different)

the full command for me is
google-chrome-unstable --enable-dom-distiller

In windows, when you right click the launcher and select properties, a window will pop up. In the text box called "target" add this after the last quotation mark
--enable-dom-distiller

Once chrome starts, when you click on the menu icon...you know those three little bars in the upper right, you will now have an option that says
Distill Page


Select this option when you are on a news article, or a website that you want to read without the distraction of ads, sidebars, other posts...etc. Again, all this does is exactly what Clearly.does, without the bells and whistles, and without installing any third party tools.

(on a side note: The color of the screen-shots are a result of my desktop set up. I use all dark colors for all applications, and tools on my laptop. This is mainly for two reasons. First it saves battery life...big time. You may have a different opinion, but when I use the default settings of black on white,  my battery drops significantly fast.  Second; it reduces eye strain. The light on dark is easier on the eye, especially when reading at night, or reading for extended periods of time. Try it on your kindle or nook, you can read way longer!  Third; it just looks good)

Thursday, February 26, 2015

Three Great Sites for Weather Data

As an Earth Science teacher, weather is always a fun topic to cover with students. We all experience weather everyday, but we hardly ever take the time to stop and truly understand what it is we are experiencing, and wonder why. Within the NGSS the approach towards weather focuses more on interpreting data, drawing conclusions, creating models, and making predictions. (Sounds like science.) However, it can sometimes be difficult to collect enough data in the course of a unit to identify trends and be able to draw accurate conclusions. Here are three great sites that can be used to collect a lot of data and gather more than enough information to start to understand weather. These are also great sites for the "device" weather fanatic that absolutely needs to know if it is sunny out without looking out the window. (I think you all know who I mean...I'm guilty at times)

Weather Underground

While there is always debate about who has the most accurate prediction, this site remains my favorite and most reliable. There are so many features hidden thorough-out the site. You can gather overwhelming amounts of real-time data. There are various reports about air quality, snow depth, mountain conditions, ocean conditions, tides, sunrise and set, moon phase, moon rise and set, 10 day forecasts, historic data, radar, satellite maps, ocean buoy data, real-time interactive maps...etc. The list goes on and on. If you want some really extensive weather data, this is the one-stop-shopping you're looking for. If you need it, it is here. (The surf reports and ocean models are more accurate than your local surf shop.)


NOAA and the NWS

This site offers all the same data as Weather Underground, and more. There is a ton of climate data, long range predictions, precipitation data, river and stream level information, atmospheric condition notifications, like pollen and ozone levels, historic data, explanations, warnings, and great real-time data. My only complaint from a student angle, is the site is a not all that engaging to look at and collect the data. The maps are somewhat stagnant, the site layout is bland and as a result students lose focus. However, for those moments when you are the hardcore weather geek and need a lot of data, you'll find all that you need here.

Weatherspark. 

This tool really only offers real-time data for specific locations. However, the visual presentation, and interactive graphical representations are very engaging for students. This site is very helpful for predicting weather based on previous events and extrapolating the patterns. Students gravitate towards this site because all the "instant gratification" needs are met. You can obtain real-time data very easily.

Combining these three tools will provide students with so much data that you'll need to drag out the green screen technology to have them film their own weather reports.

Wednesday, September 3, 2014

Digital Planning Tool

In my efforts to run a paperless classroom, I was in search for a digital planning book. I tried using Google Calendar, and it was tedious and messy. I tried using a running journal type of document in Google Docs, and again found it cumbersome.

I turned to Google and searched "digital planning books for teachers." The search returned too many options, so I started clicking and playing with the different options. I looked at Planbookedu and Planbook.com and accessed the free trials, but didn't fall in love with the tools enough to justify paying more than a paper planner for a digital service.

I took some time and gave Common Curriculum the good old "college try" and again found it a bit overwhelming. The one thing I did enjoy about  Common Curriculum was the ability to pull in the common core standards. The overall interface was a bit too busy for my own liking. I want somthing simple, clean, organized, and with a lot of options.


Just as it always works, right when I was about to throw in the towel and use some budget money to purchase a planner, I stumbled across Planboard. I gave it a try and discovered, it can also link in the Common Core standards as well as the Next Generation Science Standards, with ease. There are great options for viewing a single day, week, month, class by class, create alternating schedules, upload files, add links...the list goes on and on. The actual piece of the tool that allows you to write out your plan is straight forward and clean looking.  The best part is, it's FREE! I found my tool, with some patience and some help from Google. If you are in the market for a digital planning tool, take a look at Planboard it has a lot to offer, and the paid version can even interact with Google Apps. For now, I'll learn the free version, an justify the paid options later.


Tuesday, August 19, 2014

Lego EV3 in Linux!

Being a science teacher I'm always looking for cool new toys and ways to incorporate STEM and get my students to learn, without realizing they are learning. I had some back to school meetings today, and discovered that the EV3 Lego Mindstorm Kits I requested had arrived. I was about as happy as a kid on their birthday. I ripped open those packages so fast and started playing...then I ran into my first issue. My science lab is Linux based...all my machines are Linux. How the heck am I going to get these things connected?

Being the tech dork I am, I found a clunky workaround, a slick but complicated workaround, and one other possibility that will probably work- it hasn't been tested yet.

The Clunky Workaround

I installed the newest version of virtualbox with the newest extension pack, and guest additions. Installed Windows 7. (I activated the aero view of course. I mean if I have to use windows, I can at least make it look a bit nicer, it's not as pretty as Linux, but it will suffice). I added my host Linux user to the vboxuser group, installed libusb-0.1 and libusb-dev, plugged in the EV3 brick via USB, and voila, the windows guest virtualbox grabbed the device. I downloaded and installed the EV3 software and I was in business.  It's clunky, because that means I need to have that available for my students on all 24 Linux mint 17 XFCE machines in my science lab :(
Again which means, I need install virtualbox on all those machines, and clone the virtual OS 24 times.

The Slick Workaround.

What's wrong with teaching kids how to write Java? I installed the Lejos NXJ EV3 software on my Linux machine and made a bootable USB (not an SD) as the directions suggest. Only because I didn't' have an SD card around. I followed the tutorial and I was able to program my EV3 brick via Java. That should be a great addition for my students when they are ready to try some coding. It's a slick workaround, because I you end up flashing the EV3 brick with java, but you wipe the Linux OS that is there. (There has got to be a way to get a Linux machine to talk to the Linux OS on the brick).

Finally the not yet tested work around.

It appears as though the USB and SD ports on the brick will mount and access files. All I need is to get the Lego software running in Linux, either through WINE (which I've found out that it probably won't work) Or, create an XP virtual machine with the software. That's right, XP. Why XP? Because I don't' need to use up or buy site licenses to get the machine to run and allow students to access the software. I can clone the virtual system without any worries. Once I download the XP iso, install it on a virtual machine, grab the Lego software, have students program and save it to a USB and plug it into the brick to run. This seems the easiest, but hasn't been tested yet. Again, since XP isn't supported anymore, I can run it without the hassle of a license, since there aren't any more security updates, I can ignore the license reminders.


Sorry for the length of this post, but there might be other Science  teachers out there with robotics kits and Linux labs running into similar frustrations. So I thought, I'd share my success story thus far.
Enjoy.

Coming soon...more on Classroom for Google, and integrating Google Calendar.

Wednesday, August 13, 2014

Science Help

This may not apply to everyone, however it is a great use of technology to help explain some potentially confusing science or math concepts.


20 Gifs That Teach You Science Concepts Better Than Your Teacher Probably Can


I like the animation of PI, as well as the video showing tension of falling objects. (P.S. That is a cool trick to freak out your students, try it sometime.) 

Tuesday, May 27, 2014

Helpouts by Google

I know it's not that new of a service, it has been around since 2013, so I guess it is a toddler in the realm of technology. However, Helpouts by Google is a great resource for teachers and students to access help for various topics. So far, my searching through Helpouts has always returned useful connections. 

The way this unique tool works is that you find a subject you need help with, you schedule a time for a video conference with the specialist, and they will help you through your problem. It is very simple and much more friendly than calling tech support to have them ask you "did you try turning it off and on again?" 

Look into Helpouts by Google the next time you are stuck. 

Sunday, May 11, 2014

Auto Expire a Google Doc Share

There have been times, when it would have been nice to quickly be able to share a document with students, but only share the document for only a specified amount of time. This would allow the teacher to set a deadline and only accept submissions within a certain time frame. This article describes exactly how to do that within Google Drive. It only takes a tiny bit of scripting, where you add your shared link and set an expiration date. 
Enjoy. 

http://www.labnol.org/internet/auto-expire-google-drive-links/27509/

The script you need. (Provided by Amit Agarwal)

Monday, April 21, 2014

Twitter Guide, Dr. Seuss Style.

Here is a fantastic guide for using twitter. I think it really is the "helping friendly book" of twitter. 


Wednesday, April 16, 2014

Classroom Noise Level Indicator

There has been a bunch of posts and information floating around recently about classroom noise monitors. Free Technology For Teachers had a fantastic article about using an iPad app called Too Noisy to monitor classroom noise. As the post also describes, there is a browser version of the same tool, but the sensitivity of this version is very low. I literally have to yell at the top of my lungs to get this meter to jump about half way, and that is even when my internal microphone settings are adjusted to the most sensitive level.

I prefer using calmCounter.  It has a built in meter to adjust the levels and sensitivity, which automatically adjusts your internal microphone settings. All it does is access a microphone and causes the meter to move in response to the sound level of the classroom. It's a great visual reminder for students to use appropriate voice levels. I teach in an open concept High School. Which means there are not any traditional walls and doors. Classrooms are defined by partitions, and there is always the concern of being too loud for your neighbors.


If you aren't' sold on this tool, a similar tool to calmCounter is BouncyBalls. This tools does the same thing, but the microphone sensitivity is much lower, which means it needs a louder sound to trigger the effect.


These are great visual reminders for students to work at an appropriate sound level.


Sunday, April 13, 2014

RedShift - [A computer user tip, not necessarily education related.]

Have you ever been working on your computer at night, and found the screen brightness and color bothersome on your eyes? I use Linux Mint as my primary OS and discovered a fantastic tool called Redshift. All it does is adjust the screen color and temperature with your surroundings. It reduced that eye strain immediately. When it is running, it will auto adjust the screen over time to allow your eyes to acclimate, and theoretically avoid eye strain.  

In linux run this from the terminal 
gtk-redshift -l 42.96:-72.44 -t 6500:3700

-l 42.96:-72.44 is the lat and long for my location 
-t 6500:3700 is the temperature adjustment. Where  6500 is the color temperature of the light from the sun during the day, and 3700 is the color temperature of the average lamp in a room at night. 


This may not be the best educational technology related tool, but as an endorsed Technology Integration Specialist, and a geek who spends a lot of time on a computer, this is a great tool. Being an opensource tool based in Linux, the Windows option for the tool is command line based, and has some bugs. However, it is an eye saver. 

Saturday, April 12, 2014

Transparent Background on Google Presentation Images

Students are always looking for ways to add pictures into projects. Many times they grab an image from Google that's labeled for reuse, but the background scheme doesn't' match their project. Sometimes, it's bad enough to be a distraction. I discovered a great tool called Clippingmagic that can solve this problem.  The tool allows you to upload a photo and remove the background with a few simple steps.


Here is an image I borrowed  from a text book that I experimented with.


As you can see, there is a gross gray/blue background.

It is not all that distracting, but wouldn't it look better without that off center, off white block behind it?  I headed over to Clippingmagic, uploaded the previous photo, and within a few quick selections I converted the image into one with a transparent background. It's hard to really notice much difference besides the background. However, the background is transparent. Which means, if I were making a Google Presentation on DNA and needed a photo to fit into the theme of choice, the transparent background would fit anywhere. 


Here are some fairly hideous Google presentation themes with both images added. The one with the transparent background fits into any scheme and is much more pleasant on the eye, where the one with the gray/blue background, is annoyingly there, and is somewhat, in the way.


Here is an example from Clippingmagic's website on how easy it really is to make a transparent image. 


Next time your students want to add photos to a presentation, direct them over to Clippingmagic and adjust their photos so they work nicer with the flow of the presentation. 

Monday, March 10, 2014

The Power of Chromebooks - Advanced

Chromebooks are slowly, but surely integrating into schools around the world. One fantastic idea, but one that requires someone willing to write code is the Chrome Kiosk App.  

 "Kiosk apps allow an admin to run a single app in fullscreen mode on a Chrome device. They are useful for environments that require a user to interact with a single application such as assessments/student testing, guest check-in stations, help desk, manufacturing kiosk, and digital signage in airports and retail stores."

It's fairly straightforward to create your own Chrome App. The Chrome Kiosk App works with any chrome app, as long as the Kiosk Mode is enabled. You could customize your app to direct the user to a Google Form running in Kiosk Mode that could be used as an assessment for students. The app would run in firescreen mode to make it difficult to click on anything else but the app, until the app is closed. 

Within the GAFE (Google Apps For Education) admin panel, the chrome kiosk app can be turned on and loaded for a custom instance. This would allow the creator to make their own chrome app that is specific to the assessment they want hosted, load it into the domain chrome store, and push it out to the appropriate devices from the admin panel. To turn this option on from the admin side, go to
Device Management>chrome>Device Settings
Look for the Kiosk Settings option. 

Here is a zipped package of the files needed to create your own Kiosk App.If you don't trust mine, you can go here and make your own. 

 Here is a zipped package of a basic chrome app. Again, if you don't trust mine, you can create your own here. 

Write your codes, write them well, and put them to good use, like a custom secured assessment on the schools chromebook. 


Google Apps For Education Tips

I stumbled upon this nice tip guide shared by Shaun Pinney as seen on his blog post.

Take some time and peruse through the document, there are some useful tips.

Enjoy,

and thank you, Shaun Pinney, for sharing this guide.


Move A Google Doc To A Folder


If you were to walk into my classroom, you would most likely freeze in shock and horror at the presumable "mess" that clutters the room. To my defense, that "mess" is STEM in action. Students are usually creating some kind of apparatus, project, experiment, model, or demonstration that turns a typical organized classroom into a scene from that show Hoarders. As cluttered as it may seem, I'm very particular about the organization of my Google Drive, and how students share items with me. Recently I've had students, and teachers complain that organizing documents into folders is tedious, because the main Drive page is cluttered with too many docs. 

I just assumed that everyone knew that you could drop your doc into a folder from within the doc. Well, you know what they say when you "assume"...

Here is how to organize your new document into a folder from within the doc. 


  1. Open Google Drive
  2. Create a document
  3. Name your document
  4. Click the Folder icon next to the name
  5. Move it to the appropriate folder. 

So what if you are super organized and want to put your document into a folder from the start? The best way is to open the folder you want the document to go into, them push the create button. Alternatively you could click the down arrow next to your folder and select create from the popup menu. 
Good luck and stay organized. 


Saturday, March 1, 2014

Favorite Screencast Tool

Sometimes it is useful to record your desktop and computer usage as a tutorial for students. I often do this when teaching with Google Earth. I often want students to only use some Google Earth layers, or want them to load custom layers. It is usually easier to create a screencast to show the students exactly what to do, then to have to repeat myself a million times in the computer lab. It is also very useful to have an archive available for students in the chance they might need to reference this outside of school.

My new favorite tool for creating sceencasts is a free web based tool called Screencast-o-matic. You can make a free account, to make one screencast at a time, however it allows you options to upload directly to YouTube, download the file, or post it on  Screencast-o-matic. The video here, is a very quick tutorial I made showing students how to access the earthquake data we needed for a lab activity. (The video is very fast and wouldn't serve as a great tutorial, however, students had already had a lot of practice obtaining this data. The video was part of an archive to help students remember how to obtain the data.)


This tool runs great in all operating systems. I'm running Linux Mint 16 Petra Cinnamon Edition x64bit, and the app worked fine. (Wait hold on, let me just push up my glasses and fix my pocket protector a bit.)  As long as you have a current version of java installed, it should work fine. The nice thing about the tool is that it allows you to record your entire desktop, and will capture narrations as well.  Screencast-o-matic is a great web based tool to create simple educational tutorials and quickly add to your educators YouTube channel.


Thursday, February 27, 2014

Graphic Design Made Simple

As a teacher, I often require students to be creative and present projects that are visually pleasing and unique. I am by no means an artist, and struggle drawing the simplest stick figure scene. Today,  I discovered a tool called Canva that allows even the best stick figure artists to become a decent graphic designer.

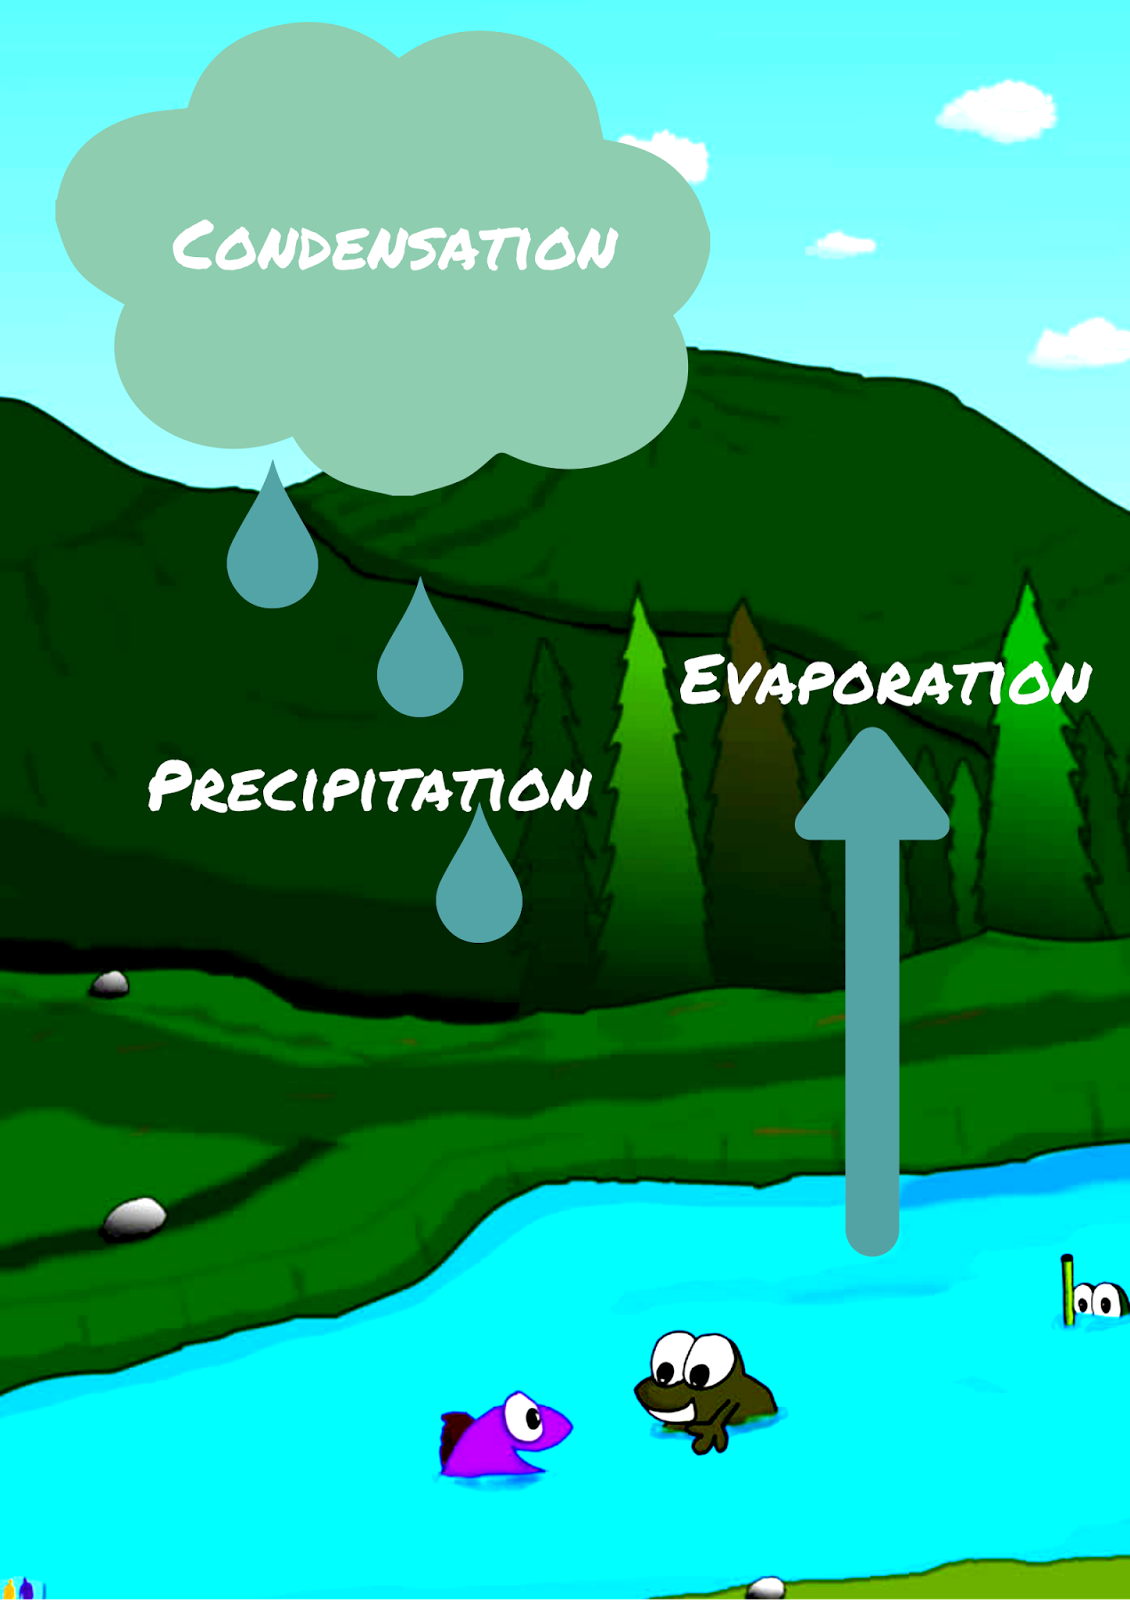
I created this  graphic in about 12 seconds. Again, I am by no means an artist, and will never claim to be.  But, within a few seconds I was able to create a decent image of the water cycle with the help of Canva.

 Imagine what students could create when challenged to present their ideas through a visual? Students are very creative and innovative. When provided with the appropriate opportunity and tools,  students creativity and innovation can be dramatically enhanced.

Canva  is user friendly, and allows anyone to express their creativity, even if they are not an artist. It offers students a simple, creative platform to produce presentations, posters, and other visualizations. It's easy to create an account, navigate the interface, create art, and share images. Canva allows the creator  to download their art to be able to upload to various social media sites for sharing and collaboration. Images are also saved in common format compatible with major editing tools like Gimp, Pixlr and Photoshop.

Add Canva to your  toolbox and provide students with an alternative way to convey their knowledge of the content.